电动车基础知识

install e-bike

Guide to Assembling an Electric Two-Wheeler

### **Guide to Assembling an Electric Two-Wheeler** #### **1. Preparation** **Tools Required:** – Screwdriver (Phillips and flathead) – Allen wrench set – Socket wrench set – Pliers – Adjustable wrench – Torque wrench – Scissors or wire cutters – Electrical tape – Zip ties **Components:** – Electric motor – Battery pack – Frame – Front and rear wheels – Handlebars – Brake levers and cables – Throttle assembly – Controller – Display unit – Pedals (if applicable) – Chain or belt – Charger – Bolts, nuts, and washers #### **2. Frame Assembly** 1. **Unpack the Frame:**    – Remove the frame from the packaging and inspect for any damage.    – Place the frame on a stable, flat surface for assembly. 2. **Attach the Front Fork:**    – Insert the front fork into the head tube of the frame.    – Secure it with the headset bearings, spacers, and top cap.    – Tighten the top cap and stem bolts using the Allen wrench. 3. **Install the Handlebars:**    – Attach the handlebars to the stem.    – Align the handlebars and tighten the bolts on the stem clamp. #### **3. Wheel Assembly** 1. **Install the Rear Wheel:**    – Align the rear wheel with the dropouts on the frame.    – Insert the axle into the dropouts and secure it with nuts and washers.    – Tighten the nuts with a socket wrench. 2. **Install the Front Wheel:**    – Align the front wheel with the dropouts on the front fork.    – Insert the axle and secure it similarly to the rear wheel. 3. **Adjust the Wheels:**    – Ensure both wheels spin freely and are aligned correctly.    – Adjust the tension of the spokes if necessary. #### **4. Brake System Installation** 1. **Attach the Brake Levers:**    – Mount the brake levers on the handlebars.    – Secure them in place with the provided bolts. 2. **Install the Brake Calipers:**    – Attach the front and rear brake calipers to their respective mounts on the frame and fork.    – Use the appropriate bolts to secure them. 3. **Connect the Brake Cables:**    – Run the brake cables from the levers to the calipers.    – Attach the cables to the calipers and adjust the tension to ensure proper braking. #### **5. Motor and Battery Installation** 1. **Install the Electric Motor:**    – If the motor is hub-mounted, ensure it’s securely attached to the wheel hub.    – If mid-drive, mount it to the designated area on the frame. 2. **Install the Battery Pack:**    – Place the battery pack in its designated area on the frame.    – Secure it with the provided brackets and bolts.    – Ensure the battery is properly aligned and securely fastened. 3. **Connect the Motor and Battery:**    – Attach the motor’s power cable to the battery’s output connector.    – Ensure the connection is tight and secure. #### **6. Throttle and Controller Installation** 1. **Mount the Throttle:**    – Attach the throttle assembly to the handlebars.    – Secure it with the screws provided. 2. **Install the Controller:**    – Mount the controller to the frame using the provided brackets or screws.    – Ensure it’s in a location that is protected from water and debris. 3. **Connect the Wiring:**    – Connect the throttle, brake sensors, and motor to the controller.    – Use zip ties to secure the wiring neatly along the frame. #### **7. Display Unit Installation** 1. **Mount the Display:**    – Attach the display unit to the handlebars.    – Secure it with the provided clamp or screws. 2. **Connect the Display:**    – Plug the display unit into the controller.    – Ensure the connection is firm. #### **8. Pedal and Chain/Belt Installation** 1. **Install the Pedals:**    – Attach the left and right pedals to the crank arms.    – Use a wrench to tighten them securely. 2. **Install the Chain/Belt:**    – If your bike uses a chain, loop it around the sprockets and join the ends.    – For a belt drive, ensure the belt is properly tensioned and aligned. #### **9. Final Adjustments** 1. **Check All Connections:**    – Ensure all electrical connections are secure and properly insulated.    – Double-check that all bolts, nuts, and screws are tight. 2. **Adjust the Seat and Handlebars:**    – Set the seat height and handlebar position to a comfortable level.    – Tighten the adjustment bolts. 3. **Test the Brakes and Throttle:**    – Squeeze the brake levers to ensure they engage properly.    – Test the throttle to confirm smooth acceleration. #### **10. Initial Power-Up and Testing** 1. **Charge the Battery:**    – Connect the charger to the battery and plug it into a power source.    – Allow the battery to charge fully before the first ride. 2. **Turn on the System:**    – Power on the bike using the main switch or button.    – Check that the display lights up and shows the correct information. 3. **Test Ride:**    – Take the bike for a short test ride.    – Check for any unusual noises, vibrations, or issues.    – Ensure that the motor, brakes, and throttle are functioning correctly. #### **11. Maintenance Tips** – Regularly check tire pressure and tread wear. – Inspect the brake pads and adjust or replace them as needed. – Keep the chain or belt lubricated and properly tensioned. – Periodically check the battery’s charge level and performance. – Clean the bike regularly to prevent dirt and debris buildup. This guide should help you successfully assemble your electric two-wheeler. Always follow safety precautions and consult the manufacturer’s manual for specific instructions related to your model.

Guide to Assembling an Electric Two-Wheeler Read More »

e bike tyre

Tire Specifications for Two-Wheel Electric Vehicles

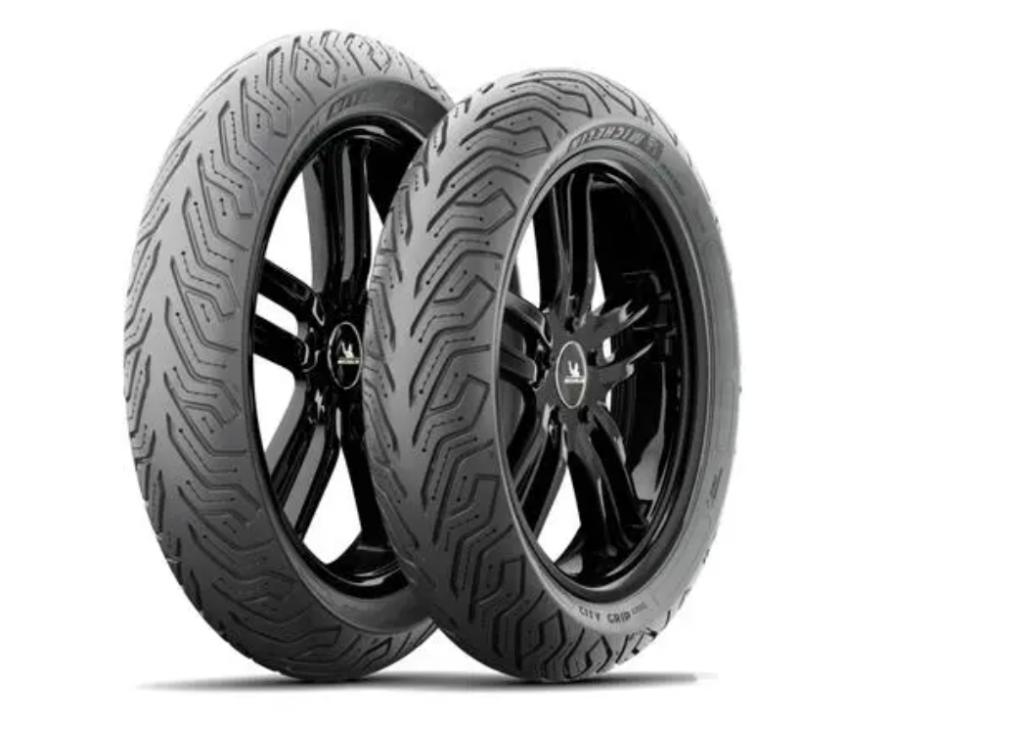
Pneumatic tires are crucial for two-wheel electric vehicles as they provide shock absorption, enhanced traction, and improved ride comfort. Depending on the type of electric vehicle, the specifications of pneumatic tires vary. Below are the common specification types. 1. Tire Diameter 12-inch: Suitable for compact electric scooters and foldable e-bikes. It offers good portability and maneuverability. 14-inch: Commonly found on small e-bikes, balancing comfort and wheel size. 16-inch: Used for medium-sized e-bikes, providing a smoother riding experience. 18-inch: A larger tire size, suitable for vehicles requiring better stability and higher load capacity. 20-inch: Common in high-performance e-bikes and some electric motorcycles, offering better speed and ground clearance. 2. Tire Width 75-inch: Suitable for lightweight e-bikes, with low friction, aiding in extending battery range. 0-inch: Offers a balanced traction and comfort, standard width for e-bikes. 125-inch: Widely used in medium-sized e-bikes and electric motorcycles, providing better stability and grip. 5-inch: Suitable for vehicles requiring higher load capacity, such as some electric motorcycles, offering stronger road adaptability. 0-inch: Ideal for off-road e-bikes or electric motorcycles needing higher traction. 3. Tire Pressure Range 30-50 PSI: Suitable for lightweight e-bikes, offering moderate comfort and battery range. 40-65 PSI: Common in standard e-bikes, ensuring a good riding experience and tire longevity. 50-85 PSI: Suitable for high-performance e-bikes and electric motorcycles, ensuring higher speed and stability. 4. Tread Pattern Slick Tread: Suitable for urban riding, providing low rolling resistance and good road grip. Semi-Slick Tread: Balances the needs for urban and light off-road riding, ideal for multipurpose e-bikes. All-Terrain Tread: Suitable for off-road e-bikes and electric motorcycles, providing excellent traction on various terrains. Mud Tread: Specifically designed for off-road, suitable for muddy and rough terrains. 5. Load Index 40-60: Suitable for lightweight e-bikes, providing a lower load capacity. 61-75: Commonly found in medium-sized e-bikes, providing moderate load capacity. 76-90: Suitable for high-load electric motorcycles, capable of carrying heavier weights. Summary Table of Specifications Specification Category Common Parameters Applicable Vehicle Types Tire Diameter 12-inch, 14-inch, 16-inch, 18-inch, 20-inch Electric scooters, small/medium/high-performance e-bikes, electric motorcycles Tire Width 1.75-inch, 2.0-inch, 2.125-inch, 2.5-inch, 3.0-inch Lightweight/medium e-bikes, electric motorcycles Tire Pressure Range 30-50 PSI, 40-65 PSI, 50-85 PSI Lightweight/standard/high-performance e-bikes, electric motorcycles Tread Pattern Slick, Semi-Slick, All-Terrain, Mud Urban e-bikes, multipurpose/off-road e-bikes, electric motorcycles Load Index 40-60, 61-75, 76-90 Lightweight/medium e-bikes, electric motorcycles These specifications help users choose the appropriate tires based on the type of vehicle, riding environment, and personal needs.

Tire Specifications for Two-Wheel Electric Vehicles Read More »

The positive impact of electric two-wheelers on human life

Electric two-wheelers are becoming increasingly popular in modern life, serving as a daily transportation tool for many people. They are not only environmentally friendly but also offer numerous practical benefits. Here are ten aspects detailing the positive impact of electric two-wheelers on human life. Firstly, electric two-wheelers have significant environmental advantages. Compared to traditional fuel-powered vehicles, electric two-wheelers emit no exhaust gases, contributing to improved air quality and helping reduce urban air pollution and greenhouse gas emissions. Secondly, electric two-wheelers are economically affordable. Their purchase cost is relatively low, and the cost of using electricity is much cheaper than gasoline. Additionally, the maintenance costs of electric two-wheelers are low due to their simple components, resulting in lower repair expenses. Thirdly, electric two-wheelers are highly energy-efficient. Electric motors have a much higher energy conversion efficiency than internal combustion engines, allowing electric two-wheelers to travel longer distances on the same amount of electricity, thus enhancing energy utilization efficiency. Fourthly, electric two-wheelers are easy to operate and convenient to use. They require no complex operations, only simple starting and controlling, with no need for gear shifting, reducing driving difficulty and making them suitable for people of all ages. Fifthly, electric two-wheelers save space. Their compact design makes it easier to find parking spaces in cities, especially in large cities with limited parking resources, highlighting the advantages of electric two-wheelers. Sixthly, electric two-wheelers are flexible and agile, ideal for short trips. Particularly in congested urban areas, electric two-wheelers can easily weave through traffic, significantly shortening commute times and improving travel efficiency. Seventhly, electric two-wheelers operate quietly. Unlike internal combustion engine vehicles, electric two-wheelers produce very little noise during operation, reducing noise pollution and noticeably improving the urban environment. Eighthly, electric two-wheelers promote a healthy lifestyle. Riding an electric two-wheeler requires some physical effort, although not as much as a bicycle, it still adds moderate exercise to daily commuting, which helps improve physical health. Ninthly, the technology of electric two-wheelers is constantly advancing. With the development of battery technology and intelligent control systems, the range, charging speed, and level of intelligence of electric two-wheelers are continuously improving, enhancing the user experience. Lastly, electric two-wheelers promote the popularization of green travel concepts. By using electric two-wheelers, people become more aware of environmental protection and sustainable development, cultivating green travel habits, and thus driving society towards a more environmentally friendly and sustainable future. In summary, electric two-wheelers not only have obvious advantages in terms of environmental protection, economy, and convenience but also enhance people’s quality of life through technological advancements and the spread of green concepts, promoting sustainable development in society.

The positive impact of electric two-wheelers on human life Read More »